There Are No Magic Camera Settings: Learn to Read the Scene Instead
Spend enough time searching for photography advice online and eventually you will run across an article promising the best camera settings for whatever you happen to be photographing. There are best settings for football, concerts, sunsets, portraits, wildlife, indoor sports, and just about every other subject that can be placed in front of a camera.
I understand why these articles are popular. When you are learning the exposure triangle, photography can feel like someone handed you three controls that all change one another and then told you to figure it out before the good light disappears. Being given a shutter speed, aperture, and ISO feels reassuring. Dial in these three numbers and you are ready to shoot.
The trouble begins when a useful starting point is mistaken for an answer. If someone tells you that the best settings for sports photography are 1/1000 second, f/2.8, and ISO 800, those numbers may be an excellent place to begin. They may also be completely wrong for the field you are standing beside. A football game at noon under bright sun and the same game under stadium lights after sunset may involve exactly the same players moving at exactly the same speed, yet require very different exposures.
The camera settings did not suddenly become wrong. The environment changed. That distinction is one of the most important things to understand while learning photography. The numbers you find in an article are not magic. They are a recipe created for a particular situation, and your job as the photographer is to understand why those ingredients were chosen so you can change them when your situation is different.
Start With What the Photograph Needs
When I teach students how to approach sports photography, I usually have them begin with shutter speed because motion is the first problem they need to solve. As a baseline, I generally do not want them dropping much below 1/800 second when they are trying to freeze fast action, although the sport, direction of movement, and photograph they are trying to make can push that number considerably higher.
The important part is not memorizing 1/800 as the sports setting. I want the student to understand why we chose it. We are protecting the variable that matters most for that photograph. Once the shutter speed is fast enough to control the movement, we can look at the available light and decide what aperture and ISO need to do.
The sport itself matters enormously. A golfer standing over a putt is not creating the same movement as a wide receiver sprinting down the field. A swimmer, gymnast, race car, basketball player, and cyclist all present different kinds of motion, and sometimes freezing that movement is not even the goal.
This becomes even clearer when we introduce panning. If the goal is to photograph a cyclist or race car with visible movement in the background, we may intentionally slow the shutter to something like 1/60 or 1/125 second and move the camera with the subject. Suddenly the shutter speed that would be disastrous for freezing a football player becomes exactly the setting we need.
That is why I prefer teaching photographers to protect the variable that matters rather than memorize settings. Once we know the shutter speed we need, we can begin solving the rest of the exposure. If there is plenty of available light, we have options. If the light begins disappearing, we have fewer choices, and something eventually has to move.
That is usually where my students begin worrying about ISO. Somewhere along the way, many beginning photographers absorb the idea that high ISO is something they should avoid at almost any cost. That can lead to the unfortunate solution of keeping the ISO beautifully low while allowing the shutter speed to become too slow. The result is a very clean file containing a very blurry athlete.
I teach the opposite priority. Get the shutter speed you need and make a proper exposure, even if that requires a higher ISO.
A sharp photograph with some noise is generally far more useful than a clean photograph ruined by motion blur. Modern noise reduction in Lightroom and Adobe Camera Raw gives photographers considerably more room to work at higher ISOs anyway, so fear of noise should not be driving the entire exposure.
The better goal is to make the strongest exposure you reasonably can when you press the shutter. Do not intentionally underexpose because you are afraid of ISO and assume you can simply drag everything back later.
RAW files give us tremendous latitude, but they are not permission to be careless. I always shoot RAW because I want as much information available as possible when I begin editing. The file gives me room to adjust shadows, highlights, color, and exposure afterward, but I still want to start with the best file I can create in camera.
That is another lesson these best-settings articles sometimes miss. The exposure triangle is not about finding the cleanest mathematical combination of three numbers. It is about deciding which compromise produces the photograph you want.
Your Lens Changes the Recipe Too
Indoor sports are one of the examples I use when teaching students why the lens itself becomes part of the exposure problem. A relatively inexpensive zoom may have a maximum aperture of f/4.5 at the wide end and f/5.6 or smaller as the lens is extended. A beginning photographer may not think much about those numbers until they enter a dim gym and discover that zooming toward the far end of the court has also taken light away from them.
The athletes did not slow down because the lens became darker. We still need enough shutter speed to control their movement, so the lost light has to be recovered somewhere else, usually with ISO. This is one of those moments when students begin understanding why constant-aperture lenses cost more and why a 70-200mm f/2.8 has been such a workhorse for sports photographers. It maintains that maximum aperture through the zoom range, so the exposure does not suddenly change simply because the photographer zoomed in. They are also considerably more expensive, because apparently physics has a premium subscription plan.
Even then, I remind students that f/2.8 is not simply the sports aperture. If the photographer is far from the action, the usable depth of field may be fairly generous. When the players begin approaching the photographer, that relationship changes. The background can soften considerably and the margin for focus becomes smaller. Where the photographer is positioned on the field and whether the action is moving toward or away from them becomes part of the exposure and composition decision.
The important thing is not that you memorize f/2.8 as the sports aperture. It is understanding what opening the lens does and deciding whether that effect helps the photograph you are trying to create.
Studio Photography Turns the Problem Around
Studio photography is one of my favorite examples because the process can feel almost backwards compared with working in available light. When I begin a studio session with strobes, I usually start around ISO 100, 1/125 second, and f/8. I have used those numbers enough that they give me a familiar place to begin, but they are not my secret studio settings. They are simply a baseline.
Before I begin worrying about the strobes, I want to know what the room itself is contributing. I will often make a test exposure with the strobes turned off. If the resulting frame is essentially black, I know the ambient light has been removed from the equation and the exposure I build from that point forward will be created primarily by the strobes. At that point, I can begin adding light intentionally.
I generally build studio lighting one light at a time because I want to understand what each source is doing before introducing another variable. That process deserves its own article, but the important point here is that camera settings are only one part of the exposure.
I use Profoto strobes frequently, and without high-speed sync my normal synchronization limit is around 1/250 second. I often start at 1/125 because it gives me flexibility if I interchange other strobes, including Godox or Flashpoint equipment. Starting there means I am not immediately working at the edge of the synchronization range.
My aperture frequently begins around f/8 because it gives me useful depth of field for the studio work I am doing. If I need more, I may move toward f/11, but I rarely need to go much farther.
Those numbers give me a known starting point, then the room begins changing them.
A studio with large white walls can bounce light back into the subject and fill shadows I intended to keep dark. A small room with colored walls can contaminate reflected light. Curtains, wall panels, ceiling height, the distance between the subject and background, and how close the light is to the model can all influence the result.
Two photographers could use identical camera settings, identical strobes, and the same model in two different rooms and produce noticeably different exposures. That is why the phrase best studio settings is almost meaningless unless the author also explains the assumptions behind them. The settings are only the beginning of the conversation.
The Moment Light Finally Makes Sense
You do not need to understand the mathematics of the inverse square law to begin using light. You can move a strobe closer, make a photograph, move it farther away, and watch what happens. Eventually, though, understanding why it happens changes the way you think.
The basic principle is that light intensity falls off rapidly as distance increases. When you begin understanding that relationship, you stop thinking only in terms of brighter and darker. You start noticing how quickly light falls across the subject, how much reaches the background, and how changing the distance between the source and subject affects the entire scene.
Learning that principle was one of the moments when photography began making much more sense to me. It did not stay confined to studio lighting. It changed how I thought about exposure in general because I started thinking in relationships rather than isolated settings.
Shutter speed had a relationship with motion. Aperture had a relationship with depth of field and available light. ISO had a relationship with sensitivity and noise. The subject’s distance from the camera changed depth of field, and the light’s distance from the subject changed intensity and falloff.
The triangle stopped being three numbers fighting with one another and became a set of controls I could use intentionally. I still use a flash meter in the studio because it is an excellent way to measure what the lights are actually doing. I will often place the meter near the model, usually below the chin, trigger the strobe, and see how close my starting guess was to the aperture I want. After enough repetition, those guesses become surprisingly accurate.
That is a small but satisfying milestone because it demonstrates that the knowledge is becoming intuitive. You are no longer searching for the right settings. You are predicting them.
The Camera Does Not Know What You Want
Histograms and highlight warnings are useful tools, and I use both regularly. I keep highlight warnings enabled on my cameras because I want to know when important areas are being pushed beyond what the sensor can retain.
The key word there is important.
If I am photographing a traditional portrait, blown highlights across someone’s face may be a problem. If I am intentionally creating a high-key image with a white background, blinking highlight warnings may be telling me that I have achieved exactly what I wanted. In this way, the camera doesn’t know the difference, or my intention.
The same applies to histograms. A low-key image can produce a histogram heavily weighted toward the shadows, while a high-key image can push much of the information toward the bright side. Neither distribution is automatically incorrect.
If I am working on a dark bodyscape, the camera’s idea of a balanced exposure may actively work against what I am trying to create. The darkness is not a technical failure. It is part of the photograph.
That is why I hesitate whenever someone describes exposure only in terms of correctness. Sometimes a technically balanced exposure is exactly what you want. Other times the photograph depends on intentionally letting some areas become dark or bright. The camera can measure light, but it cannot understand intent.
Concerts Make Magic Settings Fall Apart Quickly
Concert photography is another great teaching example because fixed exposure recipes can fall apart almost immediately. We can begin with a sensible baseline, usually a shutter speed fast enough for the performer, a relatively wide aperture, and whatever ISO the available light requires. That gets us into the neighborhood, but then the neighborhood starts moving.
A performer can walk from a dim red wash directly into a bright white spotlight. A moment later the stage may turn blue, strobes fire from behind the band, and the performer begins moving rapidly. The exposure that worked ten seconds earlier may suddenly be useless.
The lesson for the student is not to memorize a better concert recipe. It is to recognize what changed and decide which variable needs protecting now. Modern LED stage lighting can also create flicker or banding at certain shutter speeds, adding another variable that has nothing to do with the basic exposure triangle. It is worth knowing about, but the larger lesson remains the same. The photographer has to respond to the environment rather than assume the environment will cooperate with the settings.
The important question becomes what we want to protect in the image. If the performer’s face is moving through a spotlight, we may prioritize those highlights. If the surrounding darkness is part of the atmosphere, we do not necessarily want the camera trying to lift everything toward a neutral exposure. Concert photography makes the lesson obvious because the light changes dramatically. Landscapes demonstrate the same principle more quietly.
Landscapes Change Which Variable Matters
Place the camera on a tripod in front of a landscape and the priorities can reverse almost completely. If nothing important is moving, shutter speed may suddenly be the easiest variable to sacrifice. I can allow the exposure to run longer because the tripod is keeping the camera stable. That gives me more freedom to choose the aperture based on the depth of field I want and keep the ISO wherever it best serves the file.
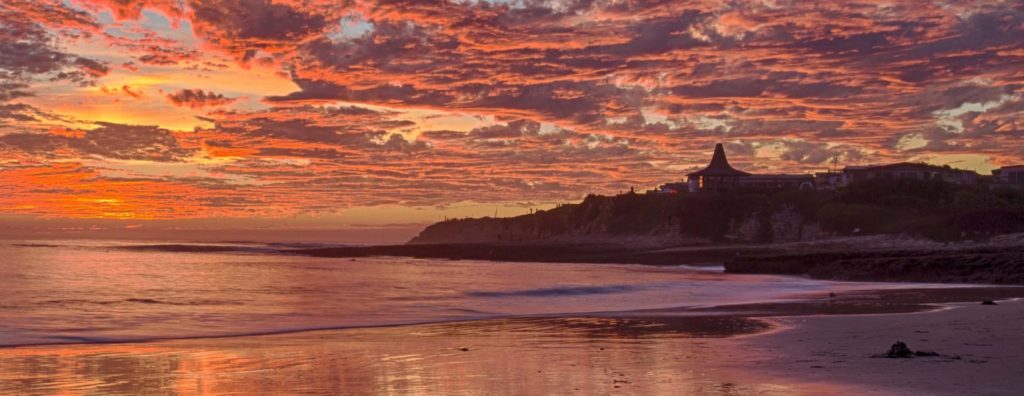
Even then, there is no universal landscape setting. Sunsets make that especially obvious. A recipe designed to create a technically balanced sunset might attempt to preserve detail in both the bright sky and dark foreground. Sometimes that is exactly what I want. Other times the sunset itself is the subject.
I may intentionally allow the foreground to become darker because I want the viewer’s attention concentrated on the color and light in the sky. A technically perfect exposure could actually weaken the photograph by revealing information I do not want emphasized. The meter may tell me one thing. The photograph in my head may ask for something else. Knowing the difference is where experience begins replacing recipes.
The Moab Photograph
One of the first times I really felt that transition happened on a trip to Moab.
We had been driving from Las Vegas toward Arches National Park, and by the time we reached the park the sun was dropping quickly. There was a formation I wanted to photograph, and we came into the parking area with the kind of urgency that happens when a photographer realizes the light is about to disappear whether or not everyone else in the car understands the emergency. I grabbed the camera and tripod and started moving. Before making the first frame, I dialed in ISO 400, f/11, and 1/25 second. It was a guess, but it was not a random guess.
I knew I wanted the depth of field from f/11. I knew the camera would be supported by the tripod, so a slower shutter was not a problem. I also knew the light was fading quickly, and ISO 400 gave me a little more room to work without forcing the shutter into a much longer exposure while I was trying to move quickly. I set up the tripod, composed the photograph, and pressed the shutter.
The exposure was right.
That first frame eventually became one of my award-winning photographs, but what I remember just as clearly is the feeling that followed it. For the first time, I felt like I truly understood what my camera was going to do before I looked at the back of it, there was a rush to that realization.
I had not stumbled onto three magic numbers. I had looked at the situation, decided what mattered, made an educated exposure based on experience, and landed very close on the first attempt. That is the skill people are really searching for when they type best camera settings for landscapes into Google. They are looking for certainty.
The better path is understanding.
Keep Reading the Settings Articles, Just Read Them Differently
I do not think articles about the best settings for a particular situation should disappear. They can be useful teaching tools, especially for someone still trying to understand how aperture, shutter speed, and ISO work together. The important thing is to stop treating the numbers as answers.
When I show students a starting recipe such as 1/1000 second, f/2.8, and ISO 800 for football, I want them looking past those three numbers almost immediately. Why was the shutter set that fast? Why was the aperture opened to f/2.8? What lighting conditions made ISO 800 reasonable?
Once they understand those decisions, I can change the light, move the action closer, or ask them to show motion instead of freezing it, and suddenly they have to think rather than copy.
The same applies to studio work.
If I tell you I often begin around ISO 100, 1/125 second, and f/8, do not memorize those settings as my secret studio formula. Ask why I chose them. Low ISO gives me a clean starting file. The shutter speed sits comfortably inside normal flash synchronization. The aperture gives me useful depth of field so that the product I am shooting is in focus, or the ears of my model aren’t a blurry mess. Most importantly, I know those numbers well enough that I can immediately recognize when the room, the lights, or the photograph require something different. That is what a baseline should do, it should get you close enough to begin thinking.
Eventually, you stop carrying dozens of memorized recipes around in your head. You walk into a scene and pay attention to the light, the movement, the subject, and the composition you are trying to create. You decide which variable matters most and build the exposure around it. Then you make a photograph, evaluate it, adjust, and continue.
With enough practice, that process becomes quick enough that it begins to feel instinctive. One day you may find yourself arriving somewhere with the light disappearing, pulling the camera from your bag, dialing in an exposure before the tripod is fully open, and discovering that the first frame is already close. That moment is far more satisfying than discovering somebody else’s perfect camera settings. It means you no longer need the magic numbers and you understand what they were trying to teach you.
If you are a beginner or intermediate photographer working through the exposure triangle and something still does not make sense, feel free to reach out to me. I am always happy to help another photographer work through a situation and understand why the camera is behaving the way it is.
The goal is not to give you my settings.
It is to help you reach the point where you can confidently choose your own.

“Ted’s journey into the landscape of the human body is a marvelous celebration of all that is physical, sensual and diverse
” – FSTOPPERS
About the author
Ted Tahquechi is a Broomfield, Colorado based professional landscape and travel photographer, educator, tactile artist, and disabled travel advocate. A blind photographer, Ted explores landscape, place, texture, luminosity, and memory through traditional photography, alternative photographic processes, and accessible art. In 2026, Ted was selected as one of six artists for the Rocky Mountain National Park Artist-in-Residence program. His residency work combines landscape photography, tactile interpretation, environmental sound, and audio description to make the experience of place more accessible to blind and low-vision audiences.
Ted and his wife, Carrie, are the creators of Tactile Photos, a project that transforms photographic texture, luminosity, shape, and form into three-dimensional tactile artwork.
View Ted’s photography at:
https://www.tahquechi.com/
Ted also operates Blind Travels, a travel publication created to empower blind and low-vision travelers with practical information for exploring the world confidently:
https://www.blindtravels.com/
His body-positive Landscapes of the Body project has been exhibited internationally:
https://www.bodyscapes.photography/
Questions or comments:
nedskee@tahquechi.com
Instagram and X: @nedskee
Bluesky: @nedskee.bsky.social